

Best Free AI for Slow Motion Video (Frame Interpolation 2026)
⚡ Quick Answer
Discover the best free AI slow motion video tools using frame interpolation to convert 30fps to 120fps without expensive hardware in 2026.
Get more content like this on Telegram!
Daily AI tips, notes & resources — free
Advertisement
I've been obsessed with slow motion video for years. There's something almost meditative about watching a hummingbird's wings frozen in time or a basketball leaving someone's hand in exquisite detail. The problem? Real slow motion requires high-frame-rate cameras — think 120fps, 240fps, even 1000fps for the dramatic stuff — and those cameras cost serious money.
AI frame interpolation changed everything. You can take ordinary 30fps footage and mathematically generate the frames that would have existed between each pair of real frames, stretching your video into smooth, convincing slow motion. The results aren't perfect, but for most use cases they're genuinely impressive.
And the best part? Several excellent tools are completely free. Let me walk you through what actually works, what doesn't, and the settings that matter most.
What Frame Interpolation Actually Does (And Why It Matters)
Before diving into tools, you need to understand the two main approaches — because they produce dramatically different results.
Optical flow is the smart approach. The algorithm analyzes each pair of frames and tracks where individual pixels (or groups of pixels) move between them. It then generates new frames by calculating intermediate positions for each tracked element. When it works well, moving objects appear in logical positions — a ball caught mid-arc between two frames gets placed exactly where physics says it should be.
Frame blending is the dumb approach. The algorithm takes two adjacent frames and literally mixes them together at different opacity ratios. A 50% blend between Frame 1 and Frame 2 creates an intermediate frame that's just both images overlaid at half opacity. The result looks like motion blur — ghostly, smeared, and unconvincing. You'll see double images around anything moving fast.
The AI-powered tools in this guide all use some form of optical flow. Some add deep learning on top of it, training neural networks on millions of frames to predict motion more accurately than traditional optical flow algorithms alone. DAIN (Depth-Aware Video Frame Interpolation) even uses depth information to prevent background pixels from bleeding through foreground objects during transitions.
For practical purposes: if a tool uses "frame blending" or "cross-fade" for slow motion, skip it. You want optical flow, period.
The Comparison: 5 Free AI Slow Motion Tools
Here's the honest breakdown across the tools I've actually tested:
| Tool | Quality | GPU Required | Free Tier | Best For |
|---|---|---|---|---|
| CapCut | Good | No | Unlimited (watermark on some) | Mobile, quick edits |
| DaVinci Resolve | Excellent | Optional (faster with) | Full free version | Professional work |
| Topaz Video AI | Best | Yes (NVIDIA preferred) | 30-day trial | Serious production |
| DAIN App | Very Good | Yes (NVIDIA CUDA) | Free, open source | Long clips, custom settings |
| FILM-Net | Excellent | Yes (required) | Free, open source | Research-grade quality |
A note on "free": CapCut puts watermarks on exports in some configurations. DaVinci Resolve Free has no watermarks and no clip limits — it's genuinely free. DAIN and FILM-Net require technical setup but cost nothing.
CapCut: The Zero-Barrier Option
CapCut is what I'd recommend to anyone who just wants slow motion without thinking too hard about it. The mobile app (iOS and Android) and the desktop version both include AI slow motion under different names — look for "Smart Slow-Mo" on mobile and "Slow Motion" with optical flow enabled on desktop.
The quality surprised me when I first used it. On talking-head footage or moderate action, it handles the interpolation cleanly. Where it breaks down is extreme motion — a cricket bat during a full swing, for example, or waves crashing with lots of chaotic water movement. In those cases you'll see frame blending artifacts even though CapCut claims to use optical flow.
Settings to use in CapCut:
- Set your timeline to 60fps before importing
- Use "Smooth Slow-Mo" not "Regular Slow-Mo"
- For 30fps source going to 0.5x speed, the interpolation has to create one new frame between each pair — very manageable
- Avoid going below 0.25x speed with 30fps source; quality degrades noticeably
The CapCut AI features go well beyond slow motion — it's worth exploring what else the platform can do once you're in there.
DaVinci Resolve Free: The Professional-Grade Zero-Cost Option
This is the tool I actually use for important work. DaVinci Resolve's free version includes the full optical flow engine — the same one that's in the paid Studio version for basic use cases. The Resolve FX optical flow system is genuinely sophisticated, and for most footage it produces results that are hard to distinguish from actual high-frame-rate capture.
Setting Up Optical Flow in DaVinci Resolve
- Import your 30fps footage to the timeline
- Right-click the clip and select "Change Clip Speed"
- Set the speed to whatever percentage achieves your target frame rate (50% for 2x slow motion)
- Under "Frame Interpolation," change from "Nearest" to "Optical Flow"
- Choose between "Speed Warp" (better quality, slower) or "Optical Flow" (faster, slightly lower quality)
- Render
The Speed Warp option uses a more advanced algorithm that handles occlusions (when one object passes in front of another) much better than basic optical flow. For anything with complex motion, always choose Speed Warp.
GPU acceleration makes a substantial difference here. With an RTX 3080, a 2-minute 4K clip renders in about 4 minutes. Without GPU acceleration, expect 20-30 minutes for the same clip. The output is worth waiting for either way.
One important caveat: Resolve's free version doesn't include the Neural Engine features found in Studio. So you get the optical flow — excellent — but not the AI-enhanced version that costs $295. For most users, the free optical flow is more than enough.
DAIN: Open-Source Deep Learning Interpolation
DAIN (Depth-Aware Video Frame Interpolation) was published as a research paper in 2019 and quickly became popular because someone packaged it into a user-friendly app. The underlying algorithm is genuinely innovative — it incorporates depth estimation so it understands that a foreground object moving in front of a background shouldn't cause the background to "warp" around it.
This matters more than you'd think. Traditional optical flow fails at object boundaries — edges stutter, ghosting appears, and the transition looks artificial. DAIN handles these boundaries more gracefully because it treats foreground and background as separate layers with different motion vectors.
The setup requires more effort than CapCut or Resolve. You need:
- An NVIDIA GPU with CUDA support (at minimum GTX 1060 with 6GB VRAM)
- Python installed
- The DAIN-APP package from GitHub
If that sounds intimidating, the DAIN-APP project provides pre-built executables for Windows that simplify the process considerably. You drop in your video, set the target frame rate multiplier, and let it run. For a 60-second 1080p clip going from 30fps to 120fps (4x interpolation), budget about 20-30 minutes on an RTX 3070.
The quality difference between DAIN and CapCut is noticeable on complex motion. DAIN preserves fine detail like hair strands, water droplets, and text on clothing. CapCut blurs these slightly. For b-roll and social content, that difference doesn't matter much. For anything going on a large screen or in a professional production, it does.
FILM-Net: The Research-Grade Option
FILM (Frame Interpolation for Large Motion) came out of Google Research and handles something neither DAIN nor traditional optical flow manages well: large motion between frames. When objects move a significant percentage of the frame between consecutive frames, most interpolation algorithms lose track of them and produce artifacts. FILM was specifically trained to handle this.
The paper showed it outperforming DAIN on benchmarks involving fast motion and proved particularly impressive on tasks like creating smooth slow motion from very sparse inputs (like going from 8fps to 60fps for old footage). You can check out the Google Research FILM project for demo comparisons that show the quality difference.
Running FILM locally requires more technical knowledge than DAIN — you're working with TensorFlow and running Python scripts directly. There's no friendly GUI. The trade-off is that when it works, the results on difficult footage with large motion are noticeably better than anything else in this comparison.
For content creators who aren't developers, I'd say: use DaVinci Resolve or DAIN. FILM is impressive but requires comfort with command-line tools and environment setup.
Converting 30fps to 120fps: The Settings That Matter
This is where most people mess up. Frame interpolation quality isn't just about the tool — it's about your source material and your settings.
Source Footage Quality
Higher quality input always produces better interpolation. This means:
- Use the least compressed version of your footage possible (ProRes, DNxHD, or high-bitrate H.264 rather than social media compressed clips)
- Avoid footage with motion blur already baked in — it confuses optical flow algorithms
- Remove video stabilization from your source if possible; some stabilization filters create subtle warping that looks terrible when interpolated
Frame Rate Math
Going from 30fps to 120fps requires 4x interpolation — the algorithm needs to create 3 new frames between each pair of real frames. This is harder than 2x interpolation (30fps to 60fps) because errors compound. A small mistake in the first generated frame affects the second generated frame, and so on.
For best quality: prefer 2x multipliers (30→60, 60→120, 24→48) over irregular multipliers. If you need 30fps to 120fps, doing it in two passes — first to 60fps, then to 120fps — sometimes produces better results than a single 4x pass.
The Motion Magnitude Sweet Spot
All interpolation algorithms have a "sweet spot" for motion magnitude. Too little movement and the result is fine. Too much movement (objects crossing more than ~30-40% of the frame between consecutive frames) and artifacts appear.
For sports content: capture at the highest frame rate your camera allows and use AI interpolation to push higher. Starting at 60fps and interpolating to 120fps is much more convincing than starting at 30fps and interpolating to 120fps.
Real-World Use Cases and What Works
I want to be honest about where free AI slow motion genuinely impresses and where it struggles.
Works great:
- Product videos with rotating objects at moderate speed
- People walking or running (not sprinting)
- Nature footage — clouds, plants moving in wind, flowing water at medium speed
- Cooking videos showing food being poured or plated
- Interview b-roll of hands gesturing
Works okay but shows artifacts:
- Sports with moderate action (a batter's swing shows some ghosting at the bat's tip)
- Fast vehicle traffic
- Ocean waves with white water
Fails noticeably:
- Very fast impacts (a punch landing, a ball being hit at maximum speed)
- Complex water with lots of spray and droplets moving in different directions
- Rapid camera movement combined with fast subject movement
- Any footage with significant motion blur already present
Knowing these limitations helps you make editorial decisions. You can avoid showing the 2-3 bad frames by cutting around them or choosing different moments to slow down.
This connects to broader AI video production workflows — if you're building a video production process, check out the InVideo AI review and Descript AI review to see how slow motion fits into a complete editing pipeline.
DaVinci vs. Topaz: When the Free Option Isn't Enough
I need to address Topaz Video AI because it comes up constantly in these conversations. It's not free — a perpetual license costs around $299 — but it's in the comparison table because many creators have a trial or consider it worth the investment.
The Topaz Video AI review covers this in detail, but the short version: Topaz uses Apollo (their proprietary slow motion model) which produces the best quality of any tool I've tested on difficult footage. The difference versus DaVinci Resolve's free optical flow is meaningful on fast motion and complex scenes.
For casual use: DaVinci Resolve free is completely sufficient. For professional work where the footage quality is the deliverable — sports cinematography, commercial production, nature videography — Topaz is worth considering.
Integrating Slow Motion Into Your Workflow
Slow motion is most effective when it serves the story. Slowing down everything turns a 2-minute video into a 10-minute slog. A few principles that work:
Use slow motion for emotional peaks. The moment of impact, the expression on someone's face, the exact second something changes — these warrant the treatment. Everything else? Play at normal speed.
Combine slow motion with music carefully. AI-generated slow motion at the wrong frame rate can feel "floaty" — slightly artificial. Matching cuts to beat drops or musical transitions distracts from any interpolation artifacts.
Consider the make money with AI YouTube angle: channels focused on cooking, sports commentary, or product reviews can use free AI slow motion to add professional production value without expensive cameras.
Practical Workflow: 30fps to 120fps in DaVinci Resolve Free
Here's the exact process I use when I need high-quality slow motion from standard footage:
- Create a new project in DaVinci Resolve, set timeline to 120fps
- Import your 30fps source clip
- Drop it on the timeline — Resolve will prompt you about the frame rate mismatch; choose "Change Clip Framerate" to 30fps
- Right-click the clip > Change Clip Speed > 25% (this creates 4x slow motion)
- Frame Interpolation: Speed Warp
- In Project Settings > Master Settings, enable GPU acceleration if available
- Render via Deliver page using H.264 or ProRes depending on destination
The 25% speed setting with Speed Warp at 120fps timeline gives you true 120fps output. What you're seeing is DaVinci creating 3 new frames for every 1 real frame, using the Speed Warp optical flow algorithm.
For social media export, 60fps is usually sufficient and renders twice as fast. Most platforms (YouTube, Instagram, TikTok) support 60fps natively.
What's Coming in 2026 for AI Slow Motion
The technology is moving fast. Several research papers published in late 2025 show frame interpolation quality approaching that of actual high-frame-rate capture even for very fast motion. The key developments to watch:
Event-based interpolation: New algorithms that model motion physics rather than just pixel movement are achieving significantly better results on fast impacts and collisions.
Real-time interpolation: NVIDIA's DLSS Frame Generation technology points toward real-time AI frame interpolation becoming standard in consumer graphics cards, which would eventually flow into video editing software.
Mobile neural engines: The A18 Pro chip in recent iPhones and the Snapdragon 8 Gen 4 have dedicated neural processing units that make on-device AI interpolation genuinely viable. CapCut is already exploiting this; other apps will follow.
The free tools are going to get meaningfully better over the next 12-18 months.
Wrapping Up
Free AI slow motion has reached a point where it's genuinely useful for professional-ish work. DaVinci Resolve with Speed Warp interpolation is my top recommendation for most creators — it's free, it's powerful, and the learning curve isn't steep once you've done it once.
For mobile-first creators, CapCut's Smart Slow-Mo is completely adequate for social content and requires no technical knowledge whatsoever.
DAIN is worth the setup effort if you regularly need to process long clips or challenging footage. The depth-aware interpolation handles complex scenes meaningfully better than CapCut.
One thing I'd caution against: over-relying on AI slow motion. It's a great tool, but shooting at a higher frame rate when possible — even 60fps instead of 30fps — gives you a better foundation to work from. AI interpolation is best when it extends real high-frame-rate footage rather than replacing it entirely.
What are you slowing down? The best use case I've seen recently was a food blogger who used DaVinci Resolve to create stunning slow-motion honey pour shots from regular 30fps iPhone footage. Completely indistinguishable from real high-speed camera work. That's the promise of this technology, and it's being delivered right now, for free.
Frequently Asked Questions
What is the best free AI slow motion tool for beginners?
CapCut is the most beginner-friendly free option. It runs on any device without GPU requirements, handles 30fps to 60fps conversion cleanly, and doesn't ask you to install anything. For better quality, DaVinci Resolve's Optical Flow is free and produces stunning results if you have a decent graphics card on your computer.
Do I need a GPU to use AI frame interpolation?
It depends on the tool. CapCut and web-based tools run on cloud servers so your hardware doesn't matter. DAIN and FILM-Net require a CUDA-capable NVIDIA GPU for local processing. DaVinci Resolve can use CPU-only mode but it's extremely slow — a mid-range GPU like an RTX 3060 makes it usable within a few minutes per clip.
What's the difference between optical flow and frame blending for slow motion?
Optical flow analyzes motion between frames and generates new frames by predicting where pixels travel. This produces fluid motion. Frame blending simply mixes adjacent frames together, which creates ghosting and blur around fast-moving objects. For any serious slow motion work, optical flow wins every time — the difference is obvious on water, sports, or anything with quick movement.
Advertisement
💬 DiscussionPowered by GitHub Discussions
Frequently Asked Questions

AiTechWorlds Team
✓ Verified WriterThe AiTechWorlds team is passionate about AI, technology, and education. We create high-quality, research-backed content to help you learn, grow, and succeed in the modern digital world.
Advertisement
Related Articles
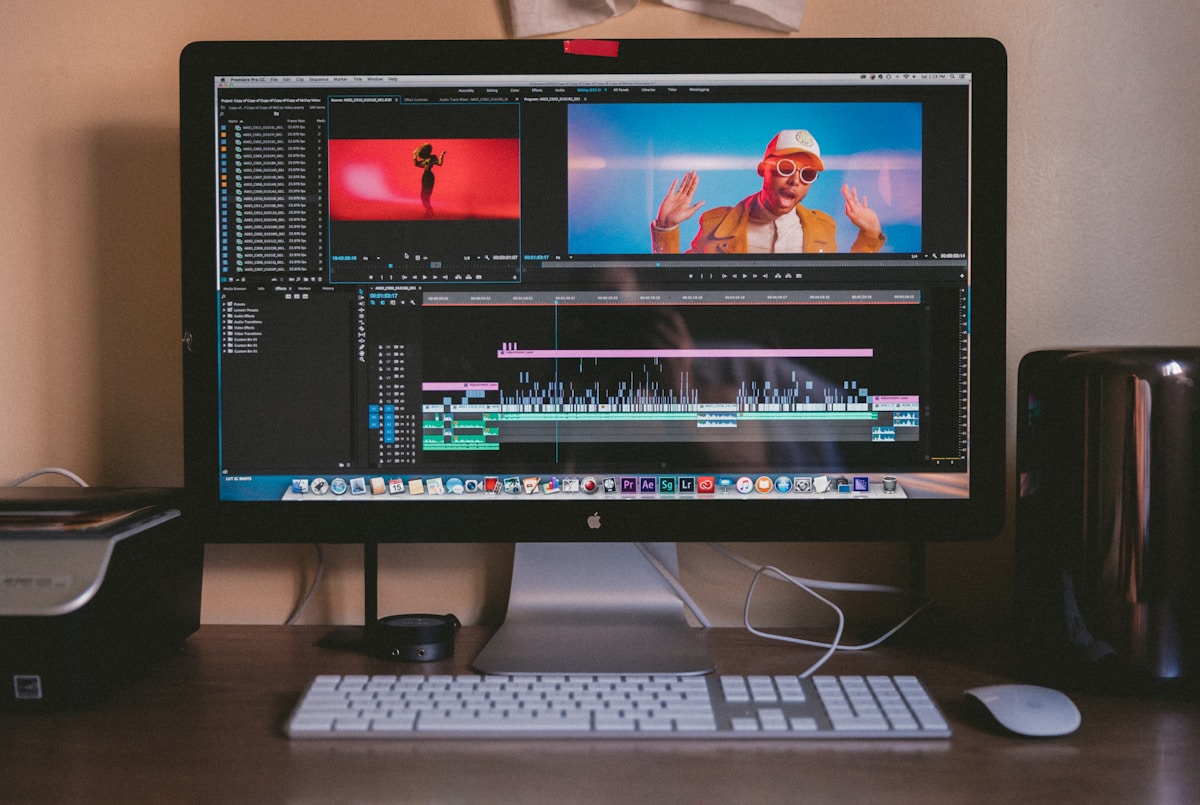
How AI-Generated Captions Boost Video Retention (With Tools)
AI caption generator video tools can increase watch time by up to 80% — here's the retention data and the tools that deliver it most reliably.
How to Generate AI Cinematic Trailers and Teasers (2026)
Learn how to use AI trailer generator tools to create cinematic teasers and promos with dramatic visuals, music sync, and 3-act structure — complete 2026 guide.

Best AI for Automatic Video Color Grading (Cinema Look 2026)
Discover the best AI color grading tools for achieving a cinema look automatically in 2026. Compare DaVinci Resolve AI, Colourlab, Topaz, and more for filmmakers.

6 AI Tools to Generate Animated Explainer Videos (No Skill Needed)
Discover the best AI explainer video generator tools for 2026 — create animated explainers with voice sync and no design experience required.